
Drywall Patching in Mount Dora, FL
Patching is the work most people try themselves first. A tub of filler from the hardware store, a putty knife, ten minutes on a Saturday, and a patch that looks fine until the light changes. Mount Dora Drywall Pros handles drywall patching in homes and commercial buildings across Mount Dora and Lake County, from single holes and dents through to a list of small repairs across a whole property. It is the least glamorous part of the trade and one of the most requested, because every building accumulates this kind of damage whether anyone plans for it or not.
What makes patching harder than it looks is that the patch has to be flat, supported, and blended in one continuous plane with what surrounds it. Filler alone shrinks and eventually cracks. A patch without backing behind it flexes and breaks free. A patch feathered too tightly leaves a ring you can see from the sofa. And a patch that was never primed shows through the paint as a dull spot regardless of how well the drywall work was done. None of this is complicated once you know it, but all of it has to happen. If you have one hole or twenty, tell us what you are dealing with and request a quote.
Get a FREE Quote.
Drywall Patching FAQs in Mount Dora
Can I just use filler from the hardware store?
For genuinely tiny holes like picture nails, yes, that is a sensible do-it-yourself job. For anything larger it usually disappoints, because lightweight fillers shrink as they dry, they have no strength across an opening, and a patch without backing behind it flexes and cracks around the edges. The other common issue is feathering, since filler applied in one pass leaves a raised ring that light catches. If it is bigger than a nail hole or sits somewhere visible, a proper patch will look better and last longer.
How big can a hole be before it needs a board patch?
Roughly speaking, anything beyond a couple of inches benefits from an actual piece of drywall rather than a compound bridge. Small holes can be filled directly. Medium holes need either a patch with backing or a self-supporting method. Larger openings need the damage cut back to a clean shape, backing installed if there is no framing, and a fitted piece of board fastened in place. Compound spanning an open cavity has no structural support and will crack, regardless of how much mesh goes over it.
Will the patch match my textured wall?
Usually, yes. Sprayed textures such as knockdown and orange peel can be matched closely once the mix and technique are tested against your actual surface. We test on sample material and compare it in the room's real lighting before applying anything. Hand-applied and heavily aged textures are harder because paint build-up has softened the original pattern. Where an exact match is unlikely, we will tell you upfront and discuss whether retexturing a full wall would give a better result.
How soon can I paint over a patch?
Once the compound is fully dry, sanded, and primed, not before. Painting over compound that is still damp underneath traps moisture and can cause the paint to blister or the joint to crack as it finishes drying. Priming is the step people skip most often, and it matters because bare compound absorbs paint differently to the surrounding painted wall, leaving a visible dull patch even when the repair itself is invisible. We prime as part of our scope so the surface is genuinely paint-ready.
Is it worth calling someone out for one small hole?
Honestly, it is better value to save them up. A single small patch carries the same travel, setup, protection, and clean-down as several, so the cost per repair drops significantly when they are bundled. If you have one urgent hole, we will certainly come and fix it. But if it is not urgent, walk the property, note everything, and have it all done in one visit. Most homeowners find a longer list than they expected once they start looking.
Why do the same cracks keep reappearing after patching?
They keep reappearing because the movement causing them has not been addressed. Cracks above doorways, at ceiling junctions, and along seams most times come from framing movement or seasonal expansion. Filling them with compound hides the line until the next cycle. A durable repair means opening the crack and reinforcing the joint properly, in some cases using a detail that accommodates movement instead of resisting it. We look at where the crack sits and which direction it runs before choosing the method rather than simply refilling it.
What Does My Drywall Project Cost?
Drywall is priced by the square foot of wall and ceiling surface — not by the size of your floor. That one fact explains most of the gap between quotes. Here are the ranges we see on real jobs around Mount Dora, and a calculator built on the same numbers.
Drywall Repair & Patch
Most single repairs land between $250 and $800. Pros price patches by the square foot of damaged area — roughly $55–$75 a foot around Mount Dora — but every repair carries a minimum job charge, because a patch takes the same setup and the same repeat trips for drying coats whether it's the size of a dinner plate or a door. Grouping several spots into one visit is the cheapest way to fix them: they share one minimum. Some repairs are priced flat by the job instead of the square foot: a cut-out ceiling section replaced and texture-matched (an 8×10 section ran $720 flat), long seam cracks (46 linear feet of re-taped seams across three rooms ran $540 flat), and popcorn removal finished smooth (230 sq ft ran $575 flat).
New Drywall Installation
For bare studs finished paint-ready (a standard Level 4 finish), plan on $1.60–$3.00 per sq ft of wall and ceiling surface, materials and labor included. A typical 12×12 bedroom with 8-foot ceilings — that's 528 sq ft of surface — runs about $890–$1,670 around Mount Dora.
Room Remodel & Replacement
Tearing out old drywall and hauling it off adds $0.60–$1.25 per sq ft on top of new installation — a combined $2.20–$4.25 per sq ft. That same 12×12 bedroom, gutted and re-drywalled, runs about $1,210–$2,330. Opening walls can uncover surprises — water damage, old wiring — and those get priced once they're visible, never guessed at in advance.
Garage Drywall
Garages run $1.55–$3.30 per sq ft depending on finish. Code requires 5/8-inch fire-rated (Type X) board on the wall shared with the house, and on the ceiling when there's living space above it — that's the fire separation, not an upsell. Most two-car garages land between $1,900 and $4,100 finished.
Texture, Skim & Paint
On walls that are already up: skim coating runs $0.95–$1.30 per sq ft, orange-peel or knockdown texture $0.80–$1.85, and primer plus two coats of paint $1.05–$2.85. A typical room's walls — about 415 sq ft of surface — usually land between $770 and $1,960 for texture and paint together.
What Moves the Price
- Finish level. A full Level 5 skim coat (for gloss paint or bright, raking light) costs more than standard paint-ready Level 4.
- Ceilings. Overhead work runs roughly 20–25% more than the same area on a wall — lifts, heavier board, two sets of hands.
- Ceiling height. Taller walls mean longer sheets, scaffolding, and slower work.
- Texture matching. Blending a patch into existing orange peel or knockdown is hand work, and it's priced like it.
- Tear-out. Removing old drywall and disposing of it is its own line on the quote.
- Job size. Small jobs carry a minimum charge; on big jobs the setup spreads over more feet, so the per-foot price drops.
These are planning ranges, not a quote — your final price is confirmed after an in-person look, before any work starts.
A note on materials. These ranges are figured with standard drywall board and the finish level you pick above. Board isn't all the same price, though: moisture- and mold-resistant board — the green or purple board for bathrooms and basements — costs more a sheet than standard board, and on a big job that can push you toward the top of your range, or a little past it. Tell us where the work is and we'll confirm the exact board and the price at the in-person estimate, before any work starts.
Estimate Your Project
Measure the damaged section itself — length × width. A full 4×8 sheet section is 32 sq ft.
Spots done in one visit share a single minimum charge.
Price includes tearing out the old drywall and hauling it off.
Includes 5/8″ Type X fire-rated board on the wall shared with the house — and on the ceiling when there is living space above it — as code requires.
Free — no obligation. Your calculator numbers ride along with the request.
Send Your Project to Mount Dora Drywall Pros
Your estimate is attached automatically. Add your info and — if you can — a few photos of the project. Photos help us price the job before we ever set foot in the house. Prefer to talk? Call (352) 623-5928.
Why People Call Us for Small Repairs
Small jobs often get treated as filler between bigger ones, which is why so many patches look like patches. Mount Dora Drywall Pros takes them on as proper work with a proper method. We size the repair to the damage rather than the convenient square, back the patch so it cannot move, build compound up in coats instead of filling it in one go, and prime before anyone paints. These are not extra steps, they are the difference between a repair that disappears and one you notice for years.
We are also practical about bundling. If you have a list of small repairs around a house or a commercial property, doing them in one visit is far better value than calling someone out for each, because setup and clean-down are a fixed cost per trip. Tell us everything that needs doing and we will price it as a program. We turn up when we say, protect the room properly even for a small job, and keep the dust contained rather than leaving a fine grey film across the furniture. Check availability and we will let you know how soon we can get to you.
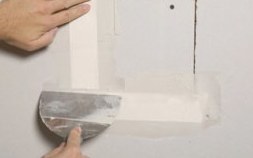
Our Drywall Patching Services
Patching covers a wide range of damage types, and the right method depends on the size of the hole, what is behind it, and where it sits. Below are the patch repairs we are called out for most often around Mount Dora.
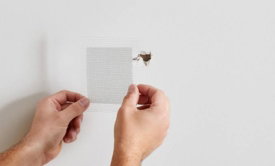
Small Hole and Dent Patching
Filling nail holes, anchor holes, dents, and small punctures left by hanging pictures, shelving, and fixtures.
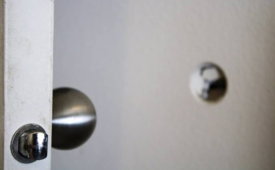
Doorknob and Impact Hole Repair
Repairing punched holes from door handles, furniture, and impacts, with backing installed so the patch stays solid.
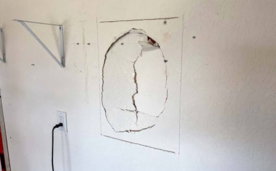
Large Hole and Cut-Out Patching
Patching openings cut for plumbing, electrical, or inspection access, fitting new board rather than bridging the gap.
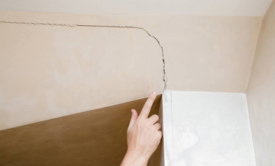
Hairline and Stress Crack Patching
Repairing cracks above doorways, at corners, and along seams, reinforcing the joint so the line does not reopen.
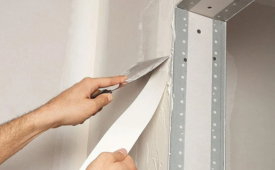
Corner and Edge Patch Repair
Rebuilding damaged external corners and edges where bead has been dented, split, or knocked loose.

Multi-Room Patch Programs
Working through a list of small repairs across a property in one visit rather than separate callouts for each.
Sizing the Patch and Checking What Is Behind It
The first decision on any patch is how far to cut back, and the answer is usually further than the damage looks. Board around a puncture is often cracked, crushed, or delaminated beyond the visible hole, and patching onto compromised material means the repair fails at the edges. We cut back to sound board and, where possible, to framing, so the new piece has something solid to fasten to. Where there is no framing at the opening, backing has to be installed behind the board first, because a patch floating on tape alone flexes and eventually cracks around its perimeter. Anything larger than a small hole needs a real piece of board rather than a mesh bridge filled with compound.
Checking behind the board matters just as much. Before cutting we consider what might be in that section of wall, including electrical cabling, plumbing, and in commercial buildings data and fire suppression lines, and we cut carefully rather than plunging through. If the damage sits near a plumbing wall, under an air conditioning line, or on an exterior wall, we check for moisture first, since a soft or stained patch means water and the source needs resolving before any repair is worthwhile. Humidity affects the program too, because compound coats need to dry fully between passes and that takes longer here, so most patches sensibly run across two visits rather than being forced into one.
Everyday Wall Damage in Local Properties
The damage we see follows how buildings get used. In homes around Mount Dora, the usual list is doorknob holes where a stop is missing, anchor holes left by removed shelving and televisions, corners clipped during furniture moves, and dents along hallways and stairwells. Rental and recently sold properties often come with a full list at once, since a turnover surfaces everything that accumulated over a tenancy. Older homes near the town center add their own items, with settlement cracks above doors and windows and corners that have absorbed decades of traffic. We work through the same repair lists in Eustis and Tavares as well.
Local conditions contribute their share too. Newer homes in the subdivisions commonly develop nail pops and small cracks at wall-to-ceiling junctions in the first couple of years as framing settles, and the long humid summers combined with hot attic spaces drive seasonal movement that reopens the same lines. Garages, enclosed lanais, and unconditioned areas see damage that conditioned rooms do not, because sustained humidity softens board and loosens fasteners over time. In commercial spaces the pattern shifts toward cart and equipment contact along corridors, anchor damage from removed signage and fittings, and openings cut for services that were never properly closed afterward.
What Affects the Cost of Drywall Patching
Patch pricing is driven by setup and finishing rather than the size of the hole. A single small patch involves travel, protection, cutting, backing, board, three coats with drying time, sanding, texture matching, and priming, and most of that applies whether the hole is two inches or twelve. This is why several repairs done in one visit cost far less per repair than the same work spread over separate callouts, and why we always ask whether there is anything else on the list.
Beyond that, the variables are access, finish, and cause. Patches at height, on ceilings, behind fixtures, or in tight spaces take longer to set up than open wall repairs at waist level. Textured surfaces add matching time, and heavily aged or hand-applied textures add more. Ceilings cost more than walls because overhead work is slower and more visible. Whether priming and painting are included changes the scope, as does whether the underlying cause, such as a missing door stop or an active leak, needs addressing first. Send photos of everything that needs doing when you request a quote and we will price the list rather than estimating blind.
How We Complete a Drywall Patch
Step 1: Photos and Repair List
You send photos and a list of everything that needs attention. Bundling repairs into one visit is significantly better value than separate callouts, so it is worth walking the property first.
Step 2: Assessment and Cause Check
We assess each repair, check for moisture, softness, and movement, and identify anything that points to an underlying cause needing attention before the patch goes in.
Step 3: Written Quote and Visit Planning
Your quote covers each repair, the number of visits expected given drying time, whether texture matching is involved, and whether priming or painting sits in our scope.
Step 4: Room Protection and Setup
Furniture is moved or covered, floors protected, and the immediate area contained so dust from cutting and sanding does not travel through the rest of the property.
Step 5: Cutting Back and Backing Installation
Damage is cut back to sound board, carefully to avoid services behind. Backing is installed where there is no framing at the opening so the patch has something solid behind it.
Step 6: Board Fitting and Taping
A new piece of board is fitted and fastened flush rather than bridging the gap with tape and compound, then the perimeter joint is taped and bedded properly.
Step 7: Coating, Feathering, and Texture Matching
Compound is built up in coats feathered progressively wider so no ring shows around the repair, then the existing texture is tested and matched across the patched area.
Step 8: Priming, Cleanup, and Final Check
The repair is primed so paint will not flash over it, dust and protection are removed, and we review each completed patch with you under the room's own lighting.
Get a Clear Quote on Your Project
The next step is a straight conversation about the space itself. Tell us what you are dealing with, send through photos or plans if you have them, and we will let you know what the work involves, how long it should take, and what it will cost. There is no obligation attached to an estimate, and we would rather spend the time getting the scope right than hand you a number that changes halfway through the job.
Mount Dora Drywall Pros works with homeowners, builders, property managers, and business owners across Mount Dora and the surrounding Lake County area. Request a quote or check availability. You will get a clear answer on timing rather than a vague callback promise. If your schedule is tight or you are coordinating around other trades, tell us upfront. We will plan the work around it.
Related Services
Drywall Repair · Water Damage Drywall Repair · Drywall Ceiling Repair · Residential Drywall Repair · Drywall Replacement · Commercial Drywall Repair · Drywall Installation · Residential Drywall Installation · Commercial Drywall Installation · Garage Drywall Installation · Metal Stud Framing · Drywall Partition Installation · Fire-Rated Drywall Installation · Moisture & Mold-Resistant Drywall Installation · Soundproof & Acoustic Drywall Installation · Suspended Ceiling Installation · Drywall Finishing · Drywall Taping & Mudding · Drywall Texture Matching · Popcorn Ceiling Removal · Drywall Painting & Finishing