
Drywall Texture Matching in Mount Dora, FL
A patch can be structurally perfect and still be obvious from the doorway. If the surrounding wall has knockdown texture and the repair is smooth, or the pattern is close but the spray density is wrong, your eye goes straight to it every time you walk in. Mount Dora Drywall Pros matches existing wall and ceiling textures across repairs and additions in homes and commercial buildings across Mount Dora and Lake County. It is the stage that determines whether anyone can find the repair afterward. It is the one most often rushed.
Matching is part technique and part patience. The same texture name covers a wide range of actual results, because the outcome depends on the mix consistency, the spray pressure, the nozzle, the distance from the wall, how long the applicator waited before knocking down, and how heavy a hand the original person had. Two knockdown ceilings in the same subdivision will not look identical. That is why we test on a sample board and compare it against the actual wall in the actual light before committing anything to the repair. Getting it wrong means sanding it off and starting again, which costs far more than testing first. Send a close-up photo of your texture and request a quote.
Get a FREE Quote.
Texture Matching FAQs in Mount Dora
Can you match any existing texture exactly?
We can get very close on most sprayed textures such as knockdown and orange peel, and reasonably close on many hand-applied finishes. What limits an exact match is age rather than technique. Years of paint build-up soften the original profile, and sun exposure changes how the surface reflects light, so fresh texture beside aged texture can differ slightly even when the pattern is right. We test before committing and tell you honestly what to expect, including when retexturing the full surface would give a better outcome.
Why does my previous repair still show even though it was textured?
Usually one of three things. The pattern density is wrong, meaning the texture is right in type but heavier or lighter than the surrounding wall. The underlying patch was not flat, so the texture is sitting on a slight bulge or hollow that light reveals. Or the repair was not primed before painting, so the patch absorbs paint differently and reads as a dull or shiny area regardless of the texture. We check which of these is happening before redoing the work, since the fix differs for each.
Is it better to match the texture or retexture the whole wall?
It depends on the surface and the size of the repair. For a small patch on a relatively recent wall, matching is usually the better value and works well. For larger repairs, heavily aged surfaces, or highly distinctive hand-applied finishes, retexturing out to a natural break such as a corner or ceiling line gives a uniform result that no one can pick. Retexturing costs more up front but avoids the frustration of a technically good match that still catches your eye.
Do I need to repaint after texture matching?
Yes, and usually more than the patch. New texture has to be primed and painted, and because the surrounding paint has aged, spot painting often leaves a visible difference even where the texture matches perfectly. Painting out to the nearest natural break, most times corner to corner, gives a far better result. We prime the textured area as part of our scope so the surface is properly sealed. You can either arrange painting separately or discuss including it.
How do I know what type of texture I have?
Take a close-up photo with light hitting the surface from the side, which reveals the profile far better than a straight-on shot. Knockdown has flattened patches with visible edges. Orange peel looks like fine spattered droplets. Skip trowel and other hand-applied finishes show trowel marks and directional pattern. Send us a photo and we will identify it and tell you how difficult it will be to match. If it is unusual, we may want to see it in person before quoting.
Can you remove texture instead of matching it?
Yes, and it is worth considering if you have been thinking about going smooth anyway. Removing texture and skim coating to a flat finish eliminates the matching problem entirely and gives a more current look. It is a larger job than patching, involving removal, skim coating, sanding, and priming across the full surface, and it produces more mess. But if you dislike the existing texture, spending on removal often makes more sense than spending on matching something you did not want in the first place. For sprayed acoustic ceilings, popcorn ceiling removal is the ceiling version of the same choice.
What Does My Drywall Project Cost?
Drywall is priced by the square foot of wall and ceiling surface — not by the size of your floor. That one fact explains most of the gap between quotes. Here are the ranges we see on real jobs around Mount Dora, and a calculator built on the same numbers.
Drywall Repair & Patch
Most single repairs land between $250 and $800. Pros price patches by the square foot of damaged area — roughly $55–$75 a foot around Mount Dora — but every repair carries a minimum job charge, because a patch takes the same setup and the same repeat trips for drying coats whether it's the size of a dinner plate or a door. Grouping several spots into one visit is the cheapest way to fix them: they share one minimum. Some repairs are priced flat by the job instead of the square foot: a cut-out ceiling section replaced and texture-matched (an 8×10 section ran $720 flat), long seam cracks (46 linear feet of re-taped seams across three rooms ran $540 flat), and popcorn removal finished smooth (230 sq ft ran $575 flat).
New Drywall Installation
For bare studs finished paint-ready (a standard Level 4 finish), plan on $1.60–$3.00 per sq ft of wall and ceiling surface, materials and labor included. A typical 12×12 bedroom with 8-foot ceilings — that's 528 sq ft of surface — runs about $890–$1,670 around Mount Dora.
Room Remodel & Replacement
Tearing out old drywall and hauling it off adds $0.60–$1.25 per sq ft on top of new installation — a combined $2.20–$4.25 per sq ft. That same 12×12 bedroom, gutted and re-drywalled, runs about $1,210–$2,330. Opening walls can uncover surprises — water damage, old wiring — and those get priced once they're visible, never guessed at in advance.
Garage Drywall
Garages run $1.55–$3.30 per sq ft depending on finish. Code requires 5/8-inch fire-rated (Type X) board on the wall shared with the house, and on the ceiling when there's living space above it — that's the fire separation, not an upsell. Most two-car garages land between $1,900 and $4,100 finished.
Texture, Skim & Paint
On walls that are already up: skim coating runs $0.95–$1.30 per sq ft, orange-peel or knockdown texture $0.80–$1.85, and primer plus two coats of paint $1.05–$2.85. A typical room's walls — about 415 sq ft of surface — usually land between $770 and $1,960 for texture and paint together.
What Moves the Price
- Finish level. A full Level 5 skim coat (for gloss paint or bright, raking light) costs more than standard paint-ready Level 4.
- Ceilings. Overhead work runs roughly 20–25% more than the same area on a wall — lifts, heavier board, two sets of hands.
- Ceiling height. Taller walls mean longer sheets, scaffolding, and slower work.
- Texture matching. Blending a patch into existing orange peel or knockdown is hand work, and it's priced like it.
- Tear-out. Removing old drywall and disposing of it is its own line on the quote.
- Job size. Small jobs carry a minimum charge; on big jobs the setup spreads over more feet, so the per-foot price drops.
These are planning ranges, not a quote — your final price is confirmed after an in-person look, before any work starts.
A note on materials. These ranges are figured with standard drywall board and the finish level you pick above. Board isn't all the same price, though: moisture- and mold-resistant board — the green or purple board for bathrooms and basements — costs more a sheet than standard board, and on a big job that can push you toward the top of your range, or a little past it. Tell us where the work is and we'll confirm the exact board and the price at the in-person estimate, before any work starts.
Estimate Your Project
Measure the damaged section itself — length × width. A full 4×8 sheet section is 32 sq ft.
Spots done in one visit share a single minimum charge.
Price includes tearing out the old drywall and hauling it off.
Includes 5/8″ Type X fire-rated board on the wall shared with the house — and on the ceiling when there is living space above it — as code requires.
Free — no obligation. Your calculator numbers ride along with the request.
Send Your Project to Mount Dora Drywall Pros
Your estimate is attached automatically. Add your info and — if you can — a few photos of the project. Photos help us price the job before we ever set foot in the house. Prefer to talk? Call (352) 623-5928.
Why Choose Mount Dora Drywall Pros for Texture Matching
Most texture failures come from skipping the test. A crew that mixes to habit, sprays straight onto the patch, and hopes for the best produces a repair that reads as a different pattern, a different density, or a different sheen once the light hits it. Mount Dora Drywall Pros tests every match on sample material first, checks it against the wall under the room's own lighting rather than a work lamp, and adjusts mix and technique until it genuinely matches before touching the repair.
We also work with the surfaces that are genuinely difficult rather than avoiding them. Hand-applied textures from older homes, aged finishes with layers of paint sitting in the pattern, and ceilings where the original applicator had a distinctive rhythm all take more effort and a different approach than a standard spray texture. Where a perfect match is not realistically achievable, we tell you that upfront and set out the alternatives, which usually means retexturing a full wall or ceiling to a natural break so the result is uniform rather than patchy. Honest assessment beats a confident promise followed by a visible patch. Check availability and we will look at your surface.
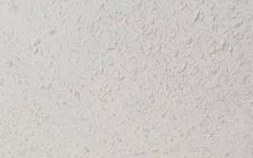
Our Texture Matching Services
Texture work spans spray-applied patterns, hand-applied finishes, and full resurfacing where matching is not practical. Below are the texture matching services we handle most often for properties around Mount Dora.
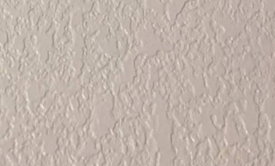
Knockdown Texture Matching
Matching knockdown patterns across repairs, adjusting spray density and knockdown timing to suit the existing surface.
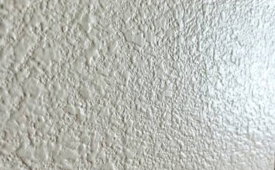
Orange Peel Texture Matching
Replicating orange peel spray textures on walls and ceilings, tuning nozzle, pressure, and mix to match the existing pattern.
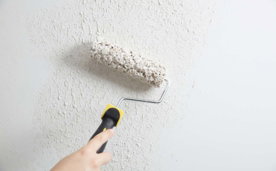
Hand-Applied and Custom Texture Matching
Reproducing skip trowel, swirl, and other hand-applied finishes found in older homes and character properties.
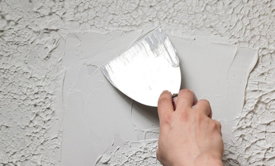
Ceiling Texture Repair and Blending
Matching ceiling textures across patches, where light crossing the surface makes any difference immediately visible.
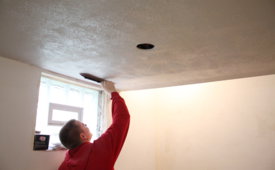
Full Wall or Ceiling Retexturing
Retexturing a complete surface to a natural break where an exact match to aged existing texture is not achievable.
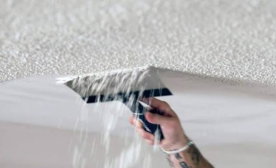
Texture Removal and Smooth Conversion
Removing existing texture and finishing smooth where you would rather change the finish than match the old one.
Testing, Lighting, and Knowing When to Retexture
Every match starts with identifying what is actually on the wall, which is not always what the homeowner calls it. Knockdown, orange peel, skip trowel, and various hand-applied finishes all have recognizable characteristics, but the specific result depends on how the original applicator worked. We examine the pattern closely, note the density and depth, then mix and test on sample board rather than experimenting on your wall. Testing is compared against the existing surface in the room's real lighting, because a match that looks right under a work light can read differently under an afternoon window. Only once the sample matches do we apply anything to the repair.
Knowing when matching will not work is equally important. Aged surfaces carry layers of paint that partially fill the texture, softening its profile in a way fresh texture over new compound cannot replicate exactly. Sun exposure and years of cleaning change how a surface reflects light. In those situations, a technically accurate match can still stand out because everything around it has aged and the repair has not. The honest answer is often to retexture the full wall or ceiling out to a natural break such as a corner or a ceiling line, which gives a uniform result. Local humidity also affects texture work, since mix consistency and drying behavior shift with conditions, and spraying in a damp, unconditioned space produces inconsistent results.
Texture Styles Across Mount Dora Properties
The textures you find around Mount Dora follow the era of the building fairly closely. Newer subdivisions favor knockdown and orange peel on walls and ceilings, applied by spray and generally consistent within a house, which makes them the most commonly requested matches locally. Because these are sprayed rather than hand-worked, matching them well is largely a question of mix, pressure, and timing, and a careful test usually gets close. Mid-century and older homes near the town center are a different matter, with hand-applied finishes, textures that vary from room to room, and surfaces that have been repaired and repainted repeatedly over the decades.
Local conditions shape the work as much as the style does. High humidity affects how texture mix behaves and how quickly it sets before knockdown, so the same technique that works in a conditioned room gives a different result in a garage or lanai. Strong sun through large windows and sliding doors, common in local homes, rakes light across textured walls and makes any mismatch obvious at certain times of day, which is why we check matches in the room's own light. Ceilings are the hardest surfaces of all here, because open-plan spaces and vaulted ceilings present large continuous areas where a patch has nowhere to hide. We match hand-applied finishes in historic homes in Mount Dora, Winter Garden, and Longwood too.
What Affects the Cost of Texture Matching
The pattern itself is the first factor. Sprayed textures such as orange peel and knockdown are relatively quick to reproduce once the mix and technique are dialed in, so the main cost is the testing and setup rather than the application. Hand-applied finishes take considerably longer because each pass is worked individually and the rhythm of the original applicator has to be read and replicated. Unusual or highly distinctive textures can require several test rounds before a match is acceptable, and that time is real work.
Area, access, and surrounding condition drive the rest. Ceiling texture costs more than wall texture because overhead application is slower and the result is more scrutinized. Height needing staging or lifts adds setup time. Spray application requires masking and protecting the surrounding room, so a small patch in a furnished space can carry more preparation time than application time. Where the surrounding surface has aged such that matching will not satisfy you, retexturing a full wall or ceiling costs more than a patch but delivers a better outcome. Priming after texturing is important and should be in the scope. Send a close-up photo with your quote request and we can assess the difficulty.
How We Match an Existing Texture
Step 1: Texture Identification and Photos
We examine the existing surface, identify the pattern type, and note its density, depth, and any distinctive characteristics. A close-up photo from you often lets us assess difficulty before the visit.
Step 2: Feasibility Assessment and Honest Advice
We tell you whether a close match is realistically achievable or whether aging and paint build-up mean retexturing the full surface will give a better result than an accurate patch.
Step 3: Written Scope and Approach
Your quote sets out the matching approach, whether full retexturing is recommended, masking and protection required, and whether priming after texturing is included in our scope.
Step 4: Surface Repair and Preparation
The underlying repair is completed, taped, coated, and sanded flat first. Texture over an uneven patch will not hide it, so the base has to be right before any pattern goes on.
Step 5: Sample Testing and Mix Adjustment
We mix and test the texture on sample board, then hold it against the existing surface in the room's own lighting and adjust mix, pressure, and technique until the match genuinely reads correctly.
Step 6: Masking and Room Protection
Surrounding walls, ceilings, trim, flooring, and fixtures are masked and protected, since spray-applied texture travels further than people expect and overspray is difficult to remove afterward.
Step 7: Texture Application and Blending
The matched texture is applied and worked into the surrounding surface so the edge of the repair blends out rather than stopping at a visible line around the patch.
Step 8: Priming, Cleanup, and Light Check
The textured area is primed so paint will not flash, masking and debris are removed, and we review the result with you under the room's real lighting from normal viewing angles.
Get a Clear Quote on Your Project
The next step is a straight conversation about the space itself. Tell us what you are dealing with, send through photos or plans if you have them, and we will let you know what the work involves, how long it should take, and what it will cost. There is no obligation attached to an estimate, and we would rather spend the time getting the scope right than hand you a number that changes halfway through the job.
Mount Dora Drywall Pros works with homeowners, builders, property managers, and business owners across Mount Dora and the surrounding Lake County area. Request a quote or check availability. You will get a clear answer on timing rather than a vague callback promise. If your schedule is tight or you are coordinating around other trades, tell us upfront. We will plan the work around it.
Related Services
Drywall Repair · Drywall Patching · Water Damage Drywall Repair · Drywall Ceiling Repair · Residential Drywall Repair · Drywall Replacement · Commercial Drywall Repair · Drywall Installation · Residential Drywall Installation · Commercial Drywall Installation · Garage Drywall Installation · Metal Stud Framing · Drywall Partition Installation · Fire-Rated Drywall Installation · Moisture & Mold-Resistant Drywall Installation · Soundproof & Acoustic Drywall Installation · Suspended Ceiling Installation · Drywall Finishing · Drywall Taping & Mudding · Popcorn Ceiling Removal · Drywall Painting & Finishing